
Adding Actions: Cycles
How to Create and Save a Walk Cycle Action in CelAction
A walk cycle you animate once should work in every scene. In CelAction, you can store a walk loop as a repeatable action in your Actions Box, then apply it anywhere without starting from scratch. Here's how to set that up properly.
What you need before you start
This tutorial uses the Jude rig as an example. The walk is animated from frame 1 to frame 21. Frame 1 and frame 21 are the same pose, with frame 21 translated along the X-axis. That matching start and end pose is what makes the cycle repeatable. Without it, your action will pop on every loop.
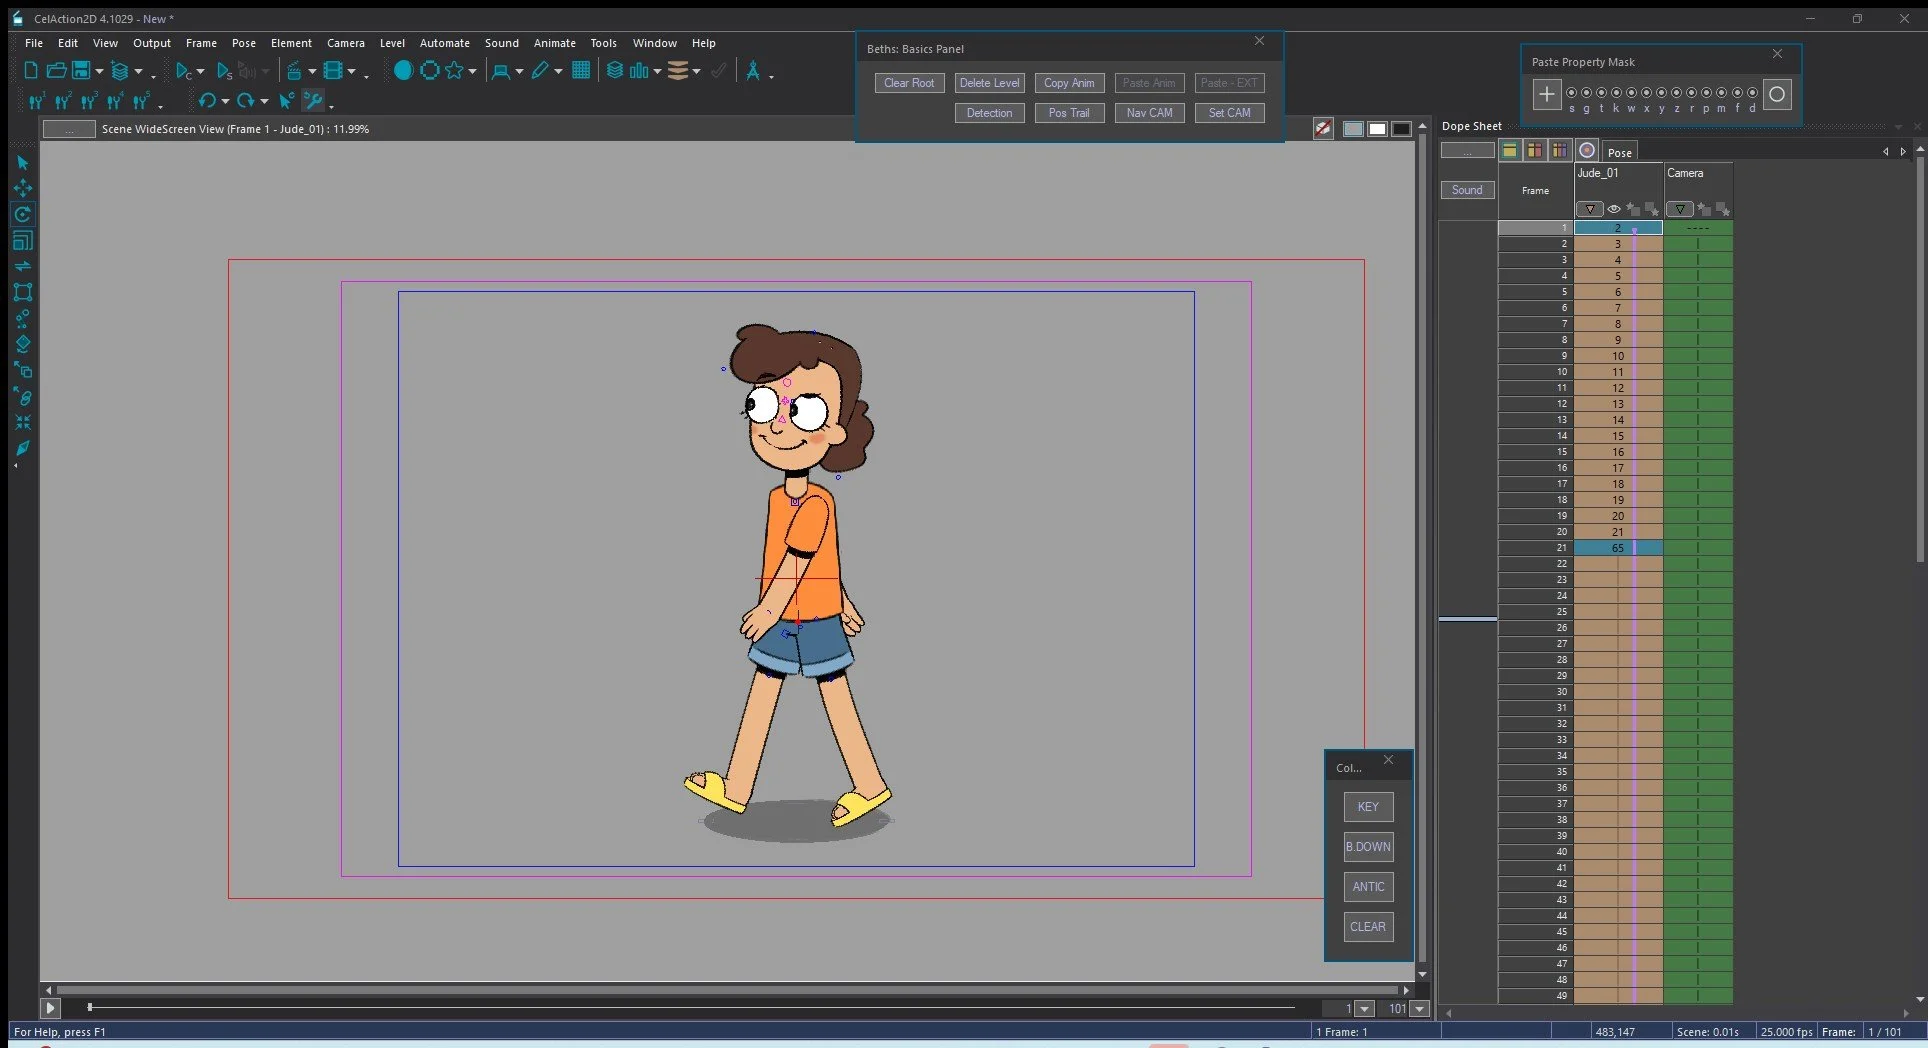
Open the Actions Info Bar
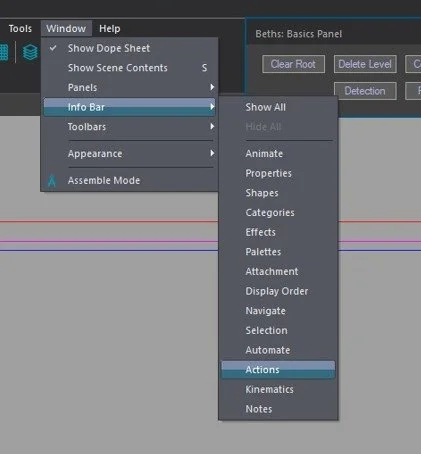
Most people reach for the Actions Box here, but that is not where you store a new action. You need the Actions Info Bar.
Go to Window → Info Bar → Actions.
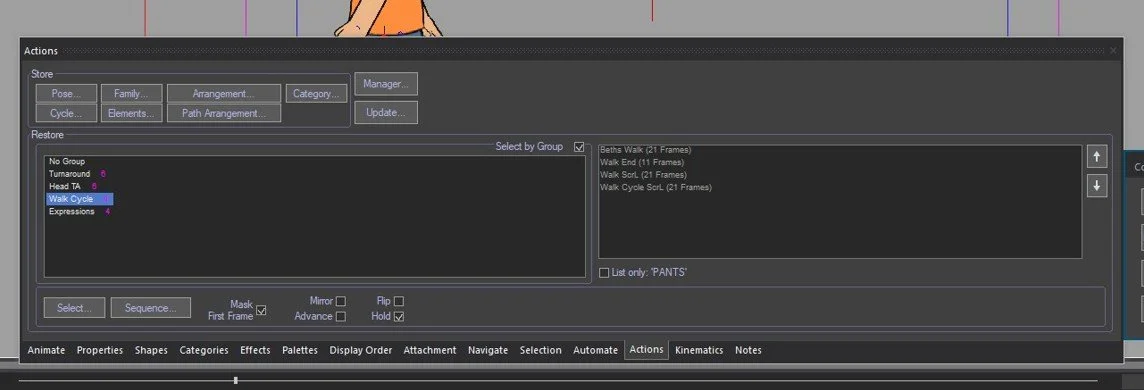
The panel gives you three options: Pose, Cycle, and Elements. For a walk loop, you want Cycle. Expressions and facial shapes use Elements. A single static pose uses Pose.
Saving the walk cycle
Select frames 1 to 21 in your timeline. With those frames selected, click Cycle in the Actions Info Bar.
The Store Pose/Cycle Action pop-up will open. Work through it from top to bottom.
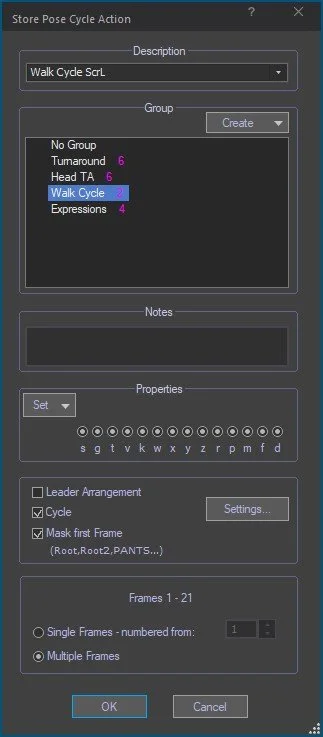
Set the name to Walk Cycle Screen Left and the group to Walk Cycle.
Leave the other properties as they are.
Make sure Cycle is ticked, then tick Mask First Frame.
Checking mask settings
Before clicking OK, go into Settings. Make sure these properties are selected:
Root
Root2
Pants
Shadow (and its child properties)
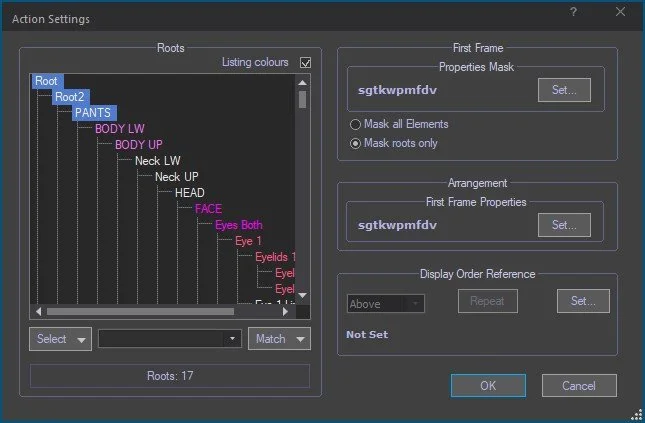
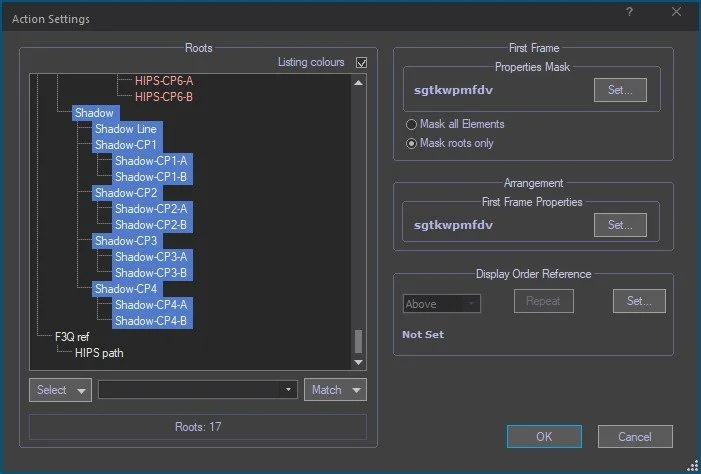
These properties need to be masked so the character translates forward relative to whatever frame the cycle is applied to, rather than snapping back to a fixed world position. If you skip this step, the character will jolt to the origin every time the cycle loops.
Once those are confirmed, check that multiple frames are still selected in your timeline. Then click OK.
Testing the cycle
Close the Actions Info Bar. Open the Actions Box with Alt-Shift-A.
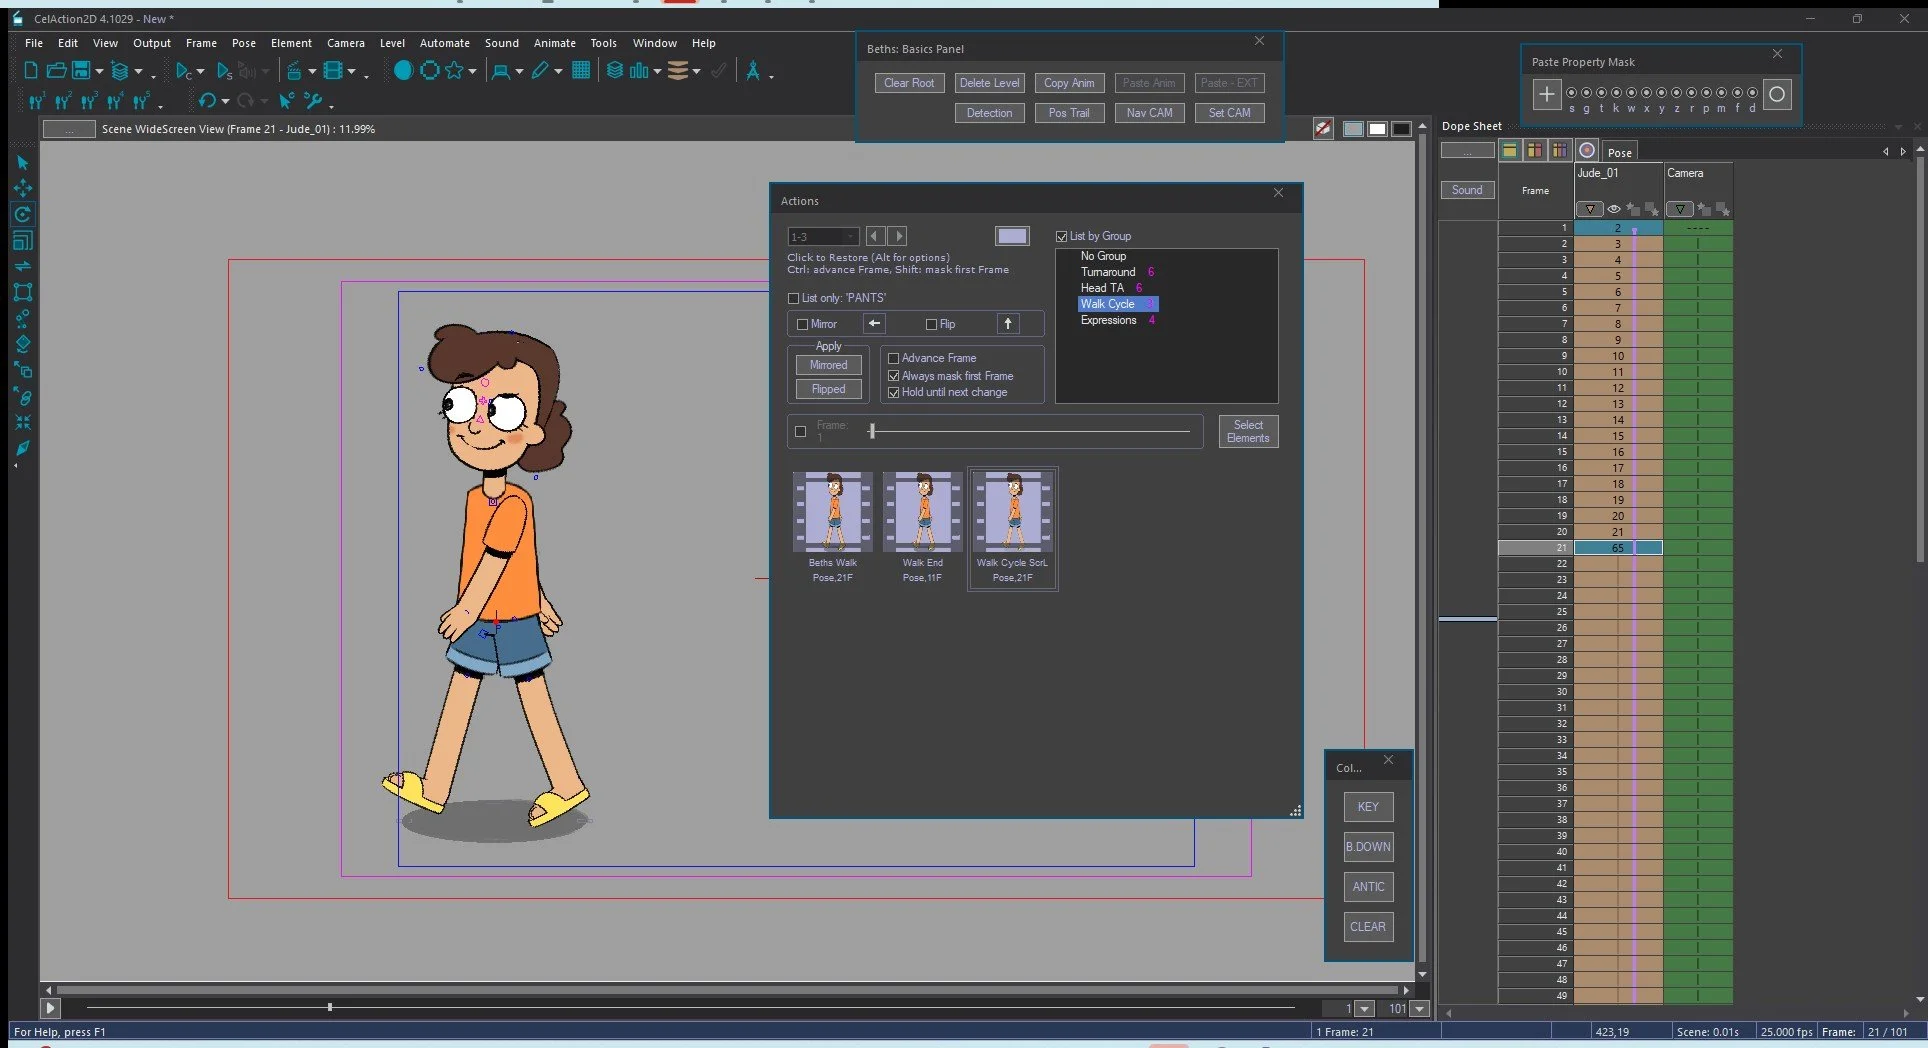
Inside the Walk Cycle group, Walk Cycle Screen Left should now be listed.
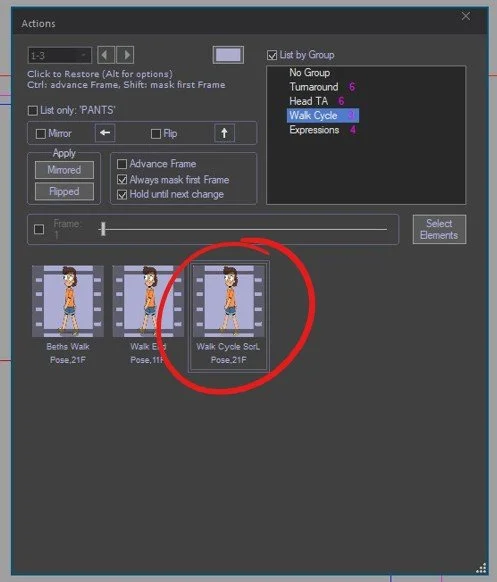
Test it like this:
Go to frame 21 and apply Walk Cycle Screen Left. Nothing should visibly change. That's correct, because frame 21 already matches frame 1.
Move to frame 22. The character should continue walking forward.
Go to frame 41 and apply Walk Cycle Screen Left again. No visible pop on the applied frame, but playback should keep advancing the walk.
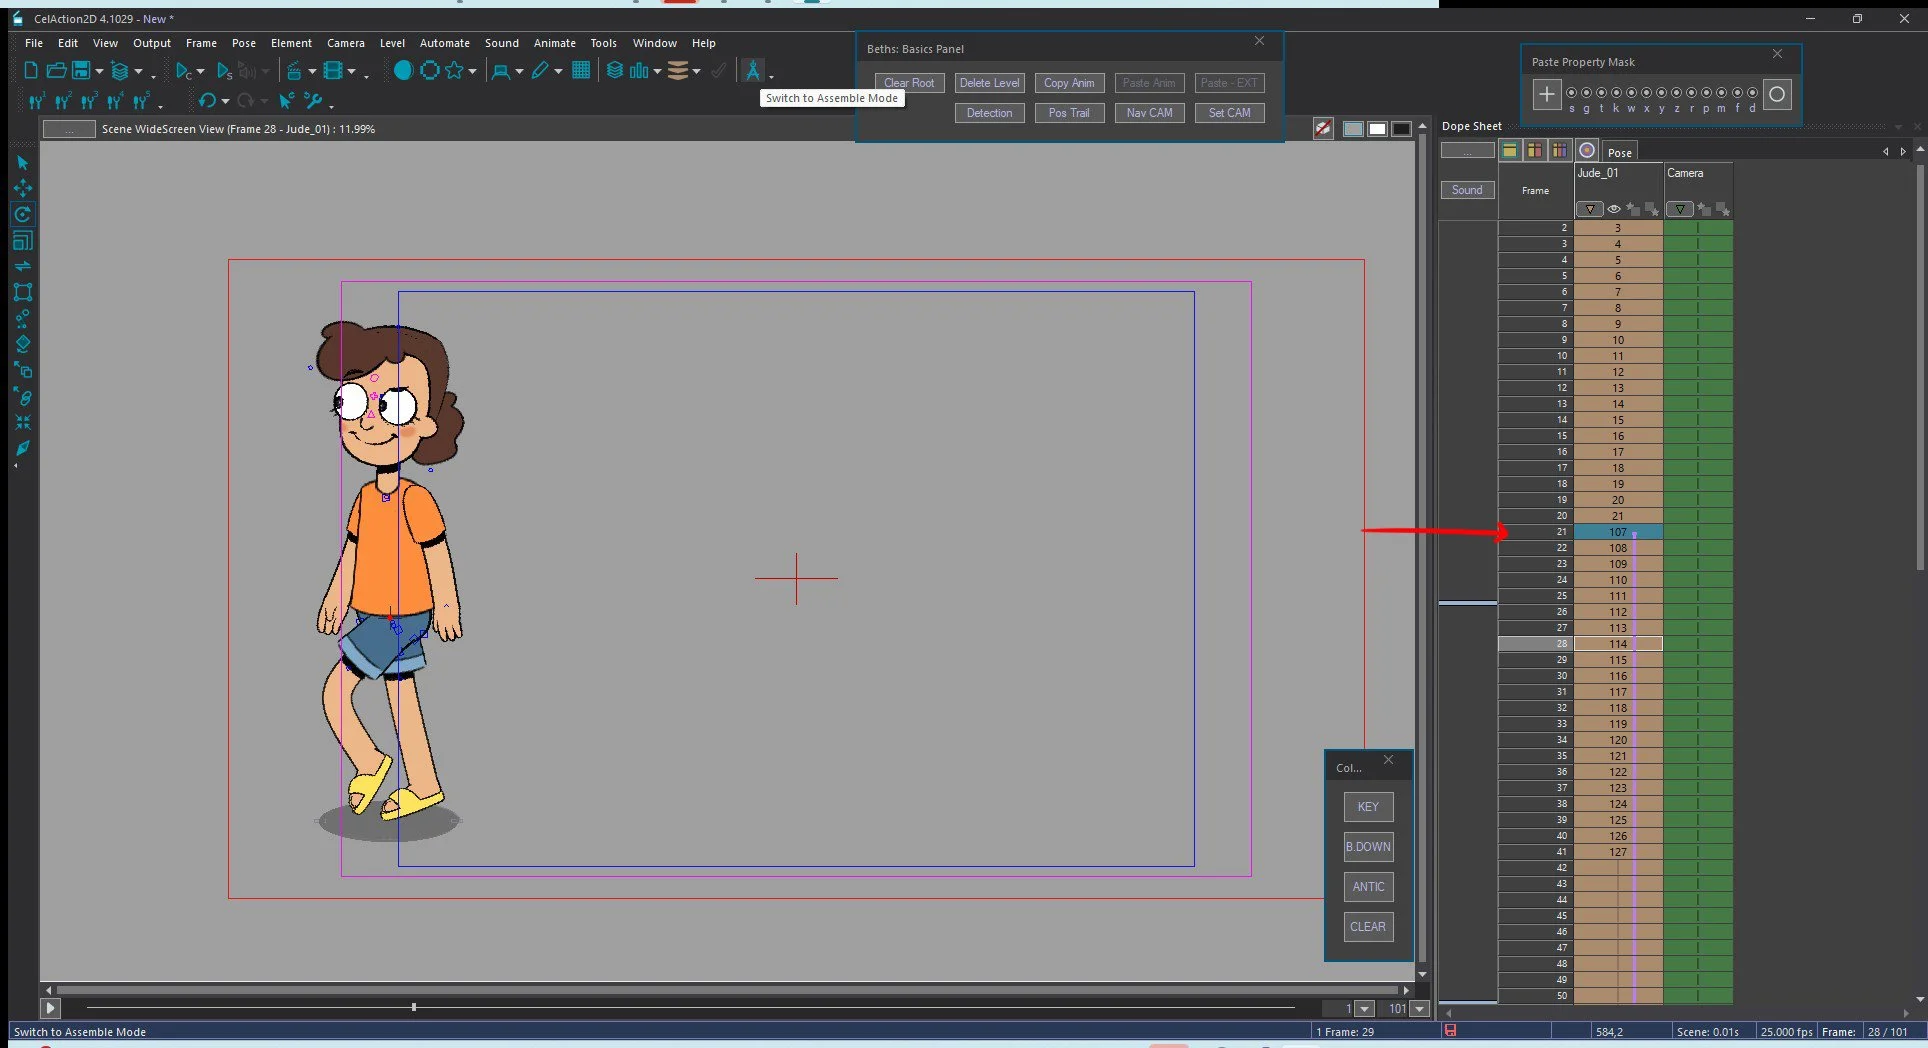
Consistent behaviour at frame 21 and frame 41 confirms the cycle is working. If you see a pop, go back and check your mask settings.
Save the actor
Once the cycle works:
Switch to Assemble mode.
File → Save Actor As.
Save the updated version of the actor.
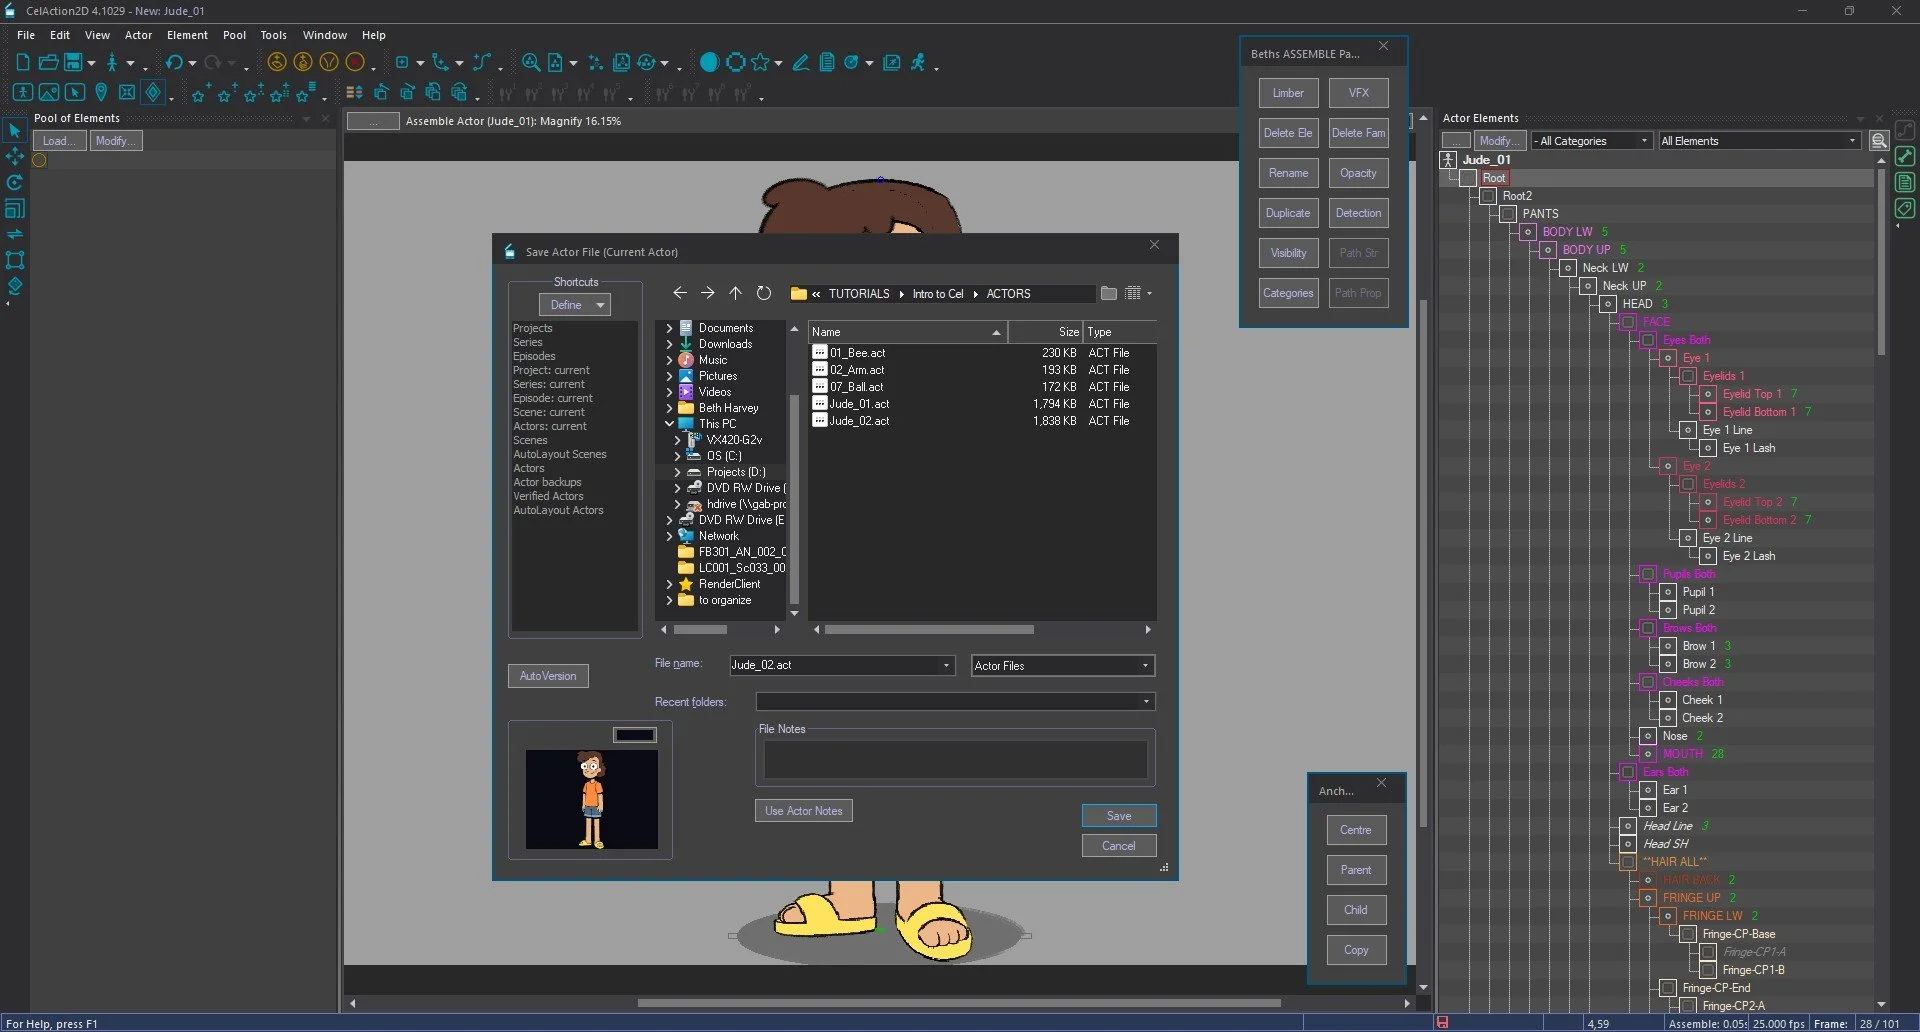
The stored action is now part of the actor file. Whenever you bring Jude into a scene, Walk Cycle Screen Left is ready in the Actions Box.
Saving the walk ending
One more action is worth storing: the walk ending. If Jude comes to a stop over roughly five poses after the loop, you can save that transition as its own reusable action.
The process is identical to storing the walk cycle:
Select the relevant frame range. In this example, that's frames 21 to 31.
Open the Actions Info Bar again (Window → Info Bar → Actions).
Click Cycle.
Name the action Walk End Screen Left and put it in the same Walk Cycle group.
Run through the same mask settings check.
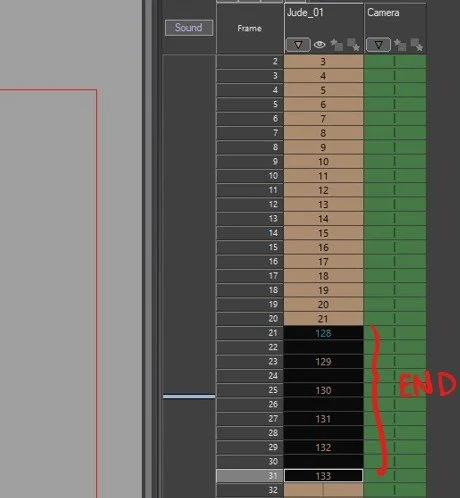
Once stored, you can apply the walk loop for as many cycles as the scene needs, then apply Walk End Screen Left to bring the character cleanly to a stop. No rebuilding the ending from scratch each time.
Happy Actioning!