
Using Source Layers for Character Lighting Effects
When you apply a lighting effect directly to a character rig in CelAction, the software applies that effect to every individual element on the rig. Eyelids, shadows, body parts - each one processed separately. The result looks wrong.
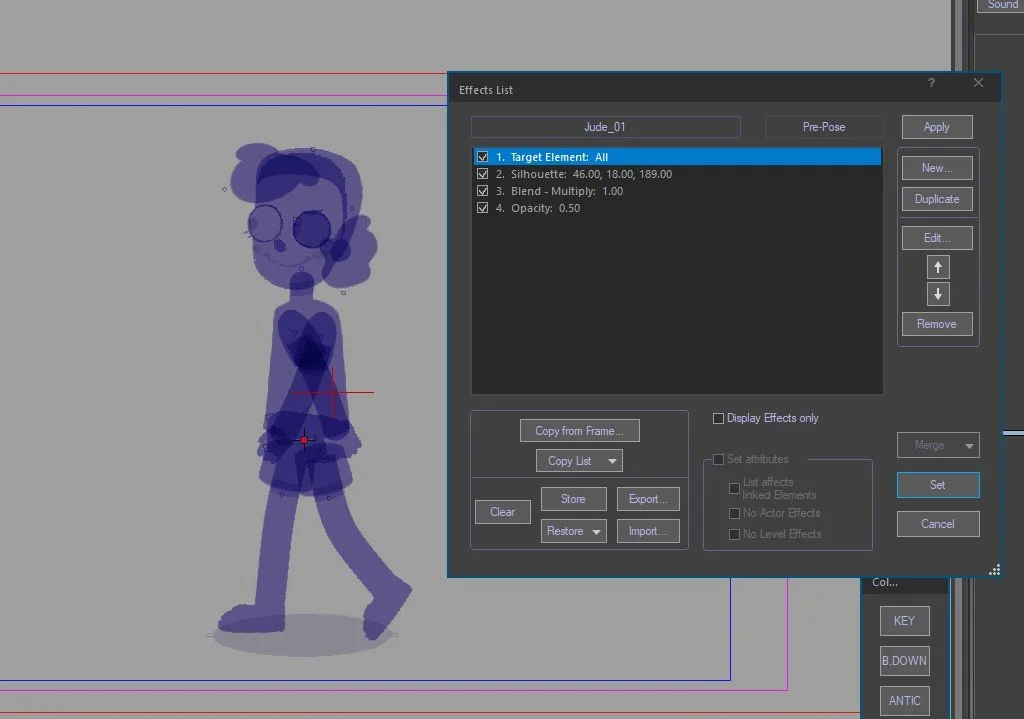
What you want instead is for the effect to treat the whole character as one flat image - the visible result of the rig, not each piece it's made of. Source layers are how you get there.
A source layer references your original rig and renders a flattened version of it. You apply effects to that. The original rig keeps animating normally; the source layer mirrors it and carries the colour treatment.
Here's how to set one up, using a simple nighttime effect as the example.
Create the source layer
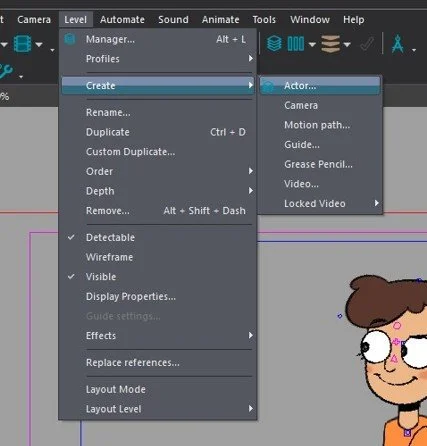
Go to Level > Create > Actor.
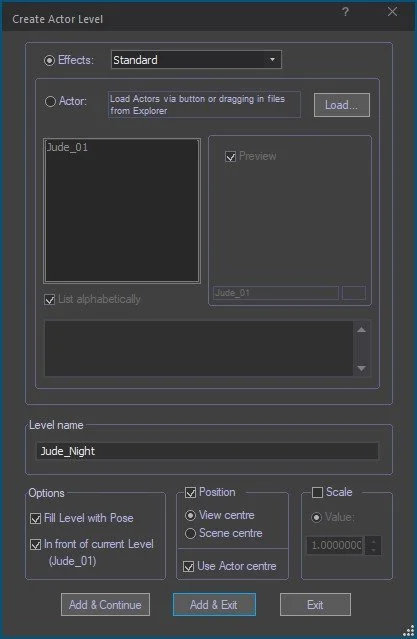
Tick Effects.
Choose Standard Effect.
Name the layer after the character and the purpose - for example, Jude Night.
Click OK. The new layer will appear blank. That's expected.
Open the effects list
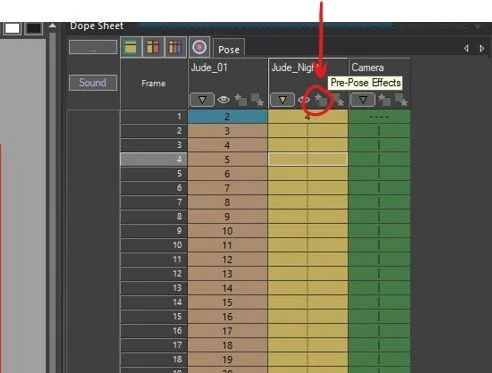
This setup happens in pre-pose. On the dope sheet for your new layer, look for a small box with a star next to the visibility toggle and the drop-down arrow. Click it to open the effects list.
The order of effects matters
The effects list processes in sequence. For a lighting effect, the correct order is:
Source the rig
Target the root
Apply colour and blend
Adjust opacity
Step 1: Source the original rig
In the effects list, click New.
Start typing source - it'll filter the list. Choose Source Level.
With Auto Apply ticked, you'll see the character appear in the viewport. It'll probably look wrong - offset, masking broken, shadow at full opacity. Don't adjust anything yet.
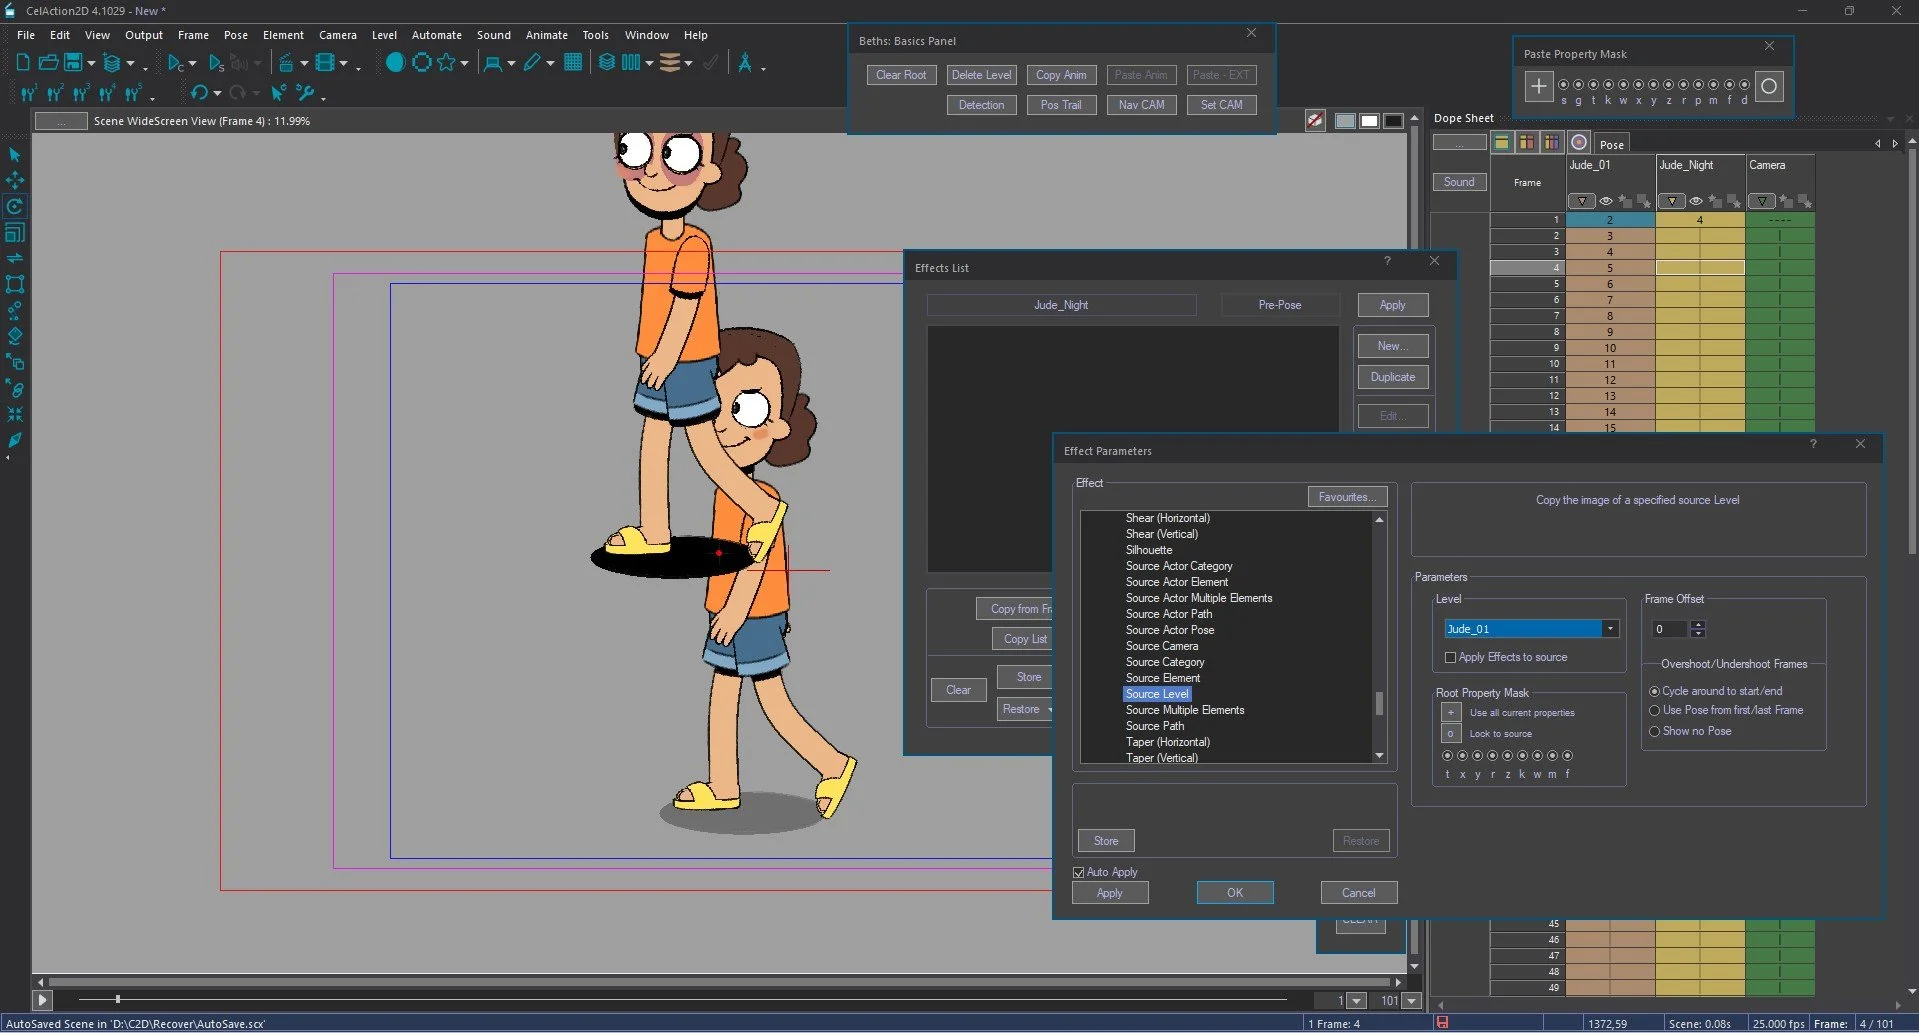
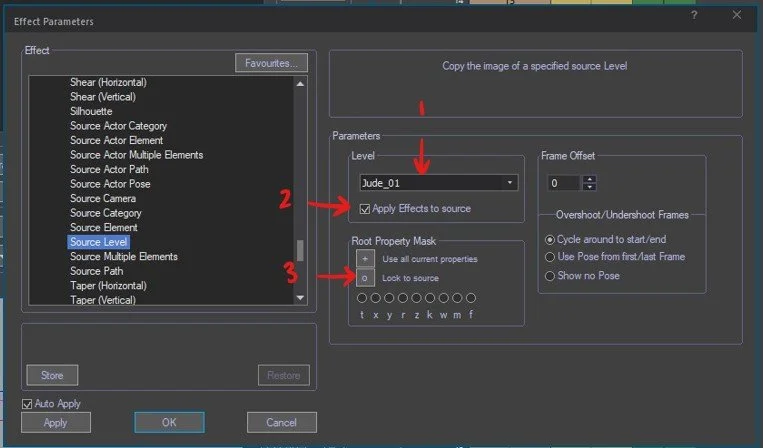
Under Parameters > Level
Tick Apply effects to source. The rig should now display correctly.
Under Root Property Mask, click the O button - it's underneath the plus, next to where it says Use all current properties. This locks the source to match the original rig exactly, with no frame offset.
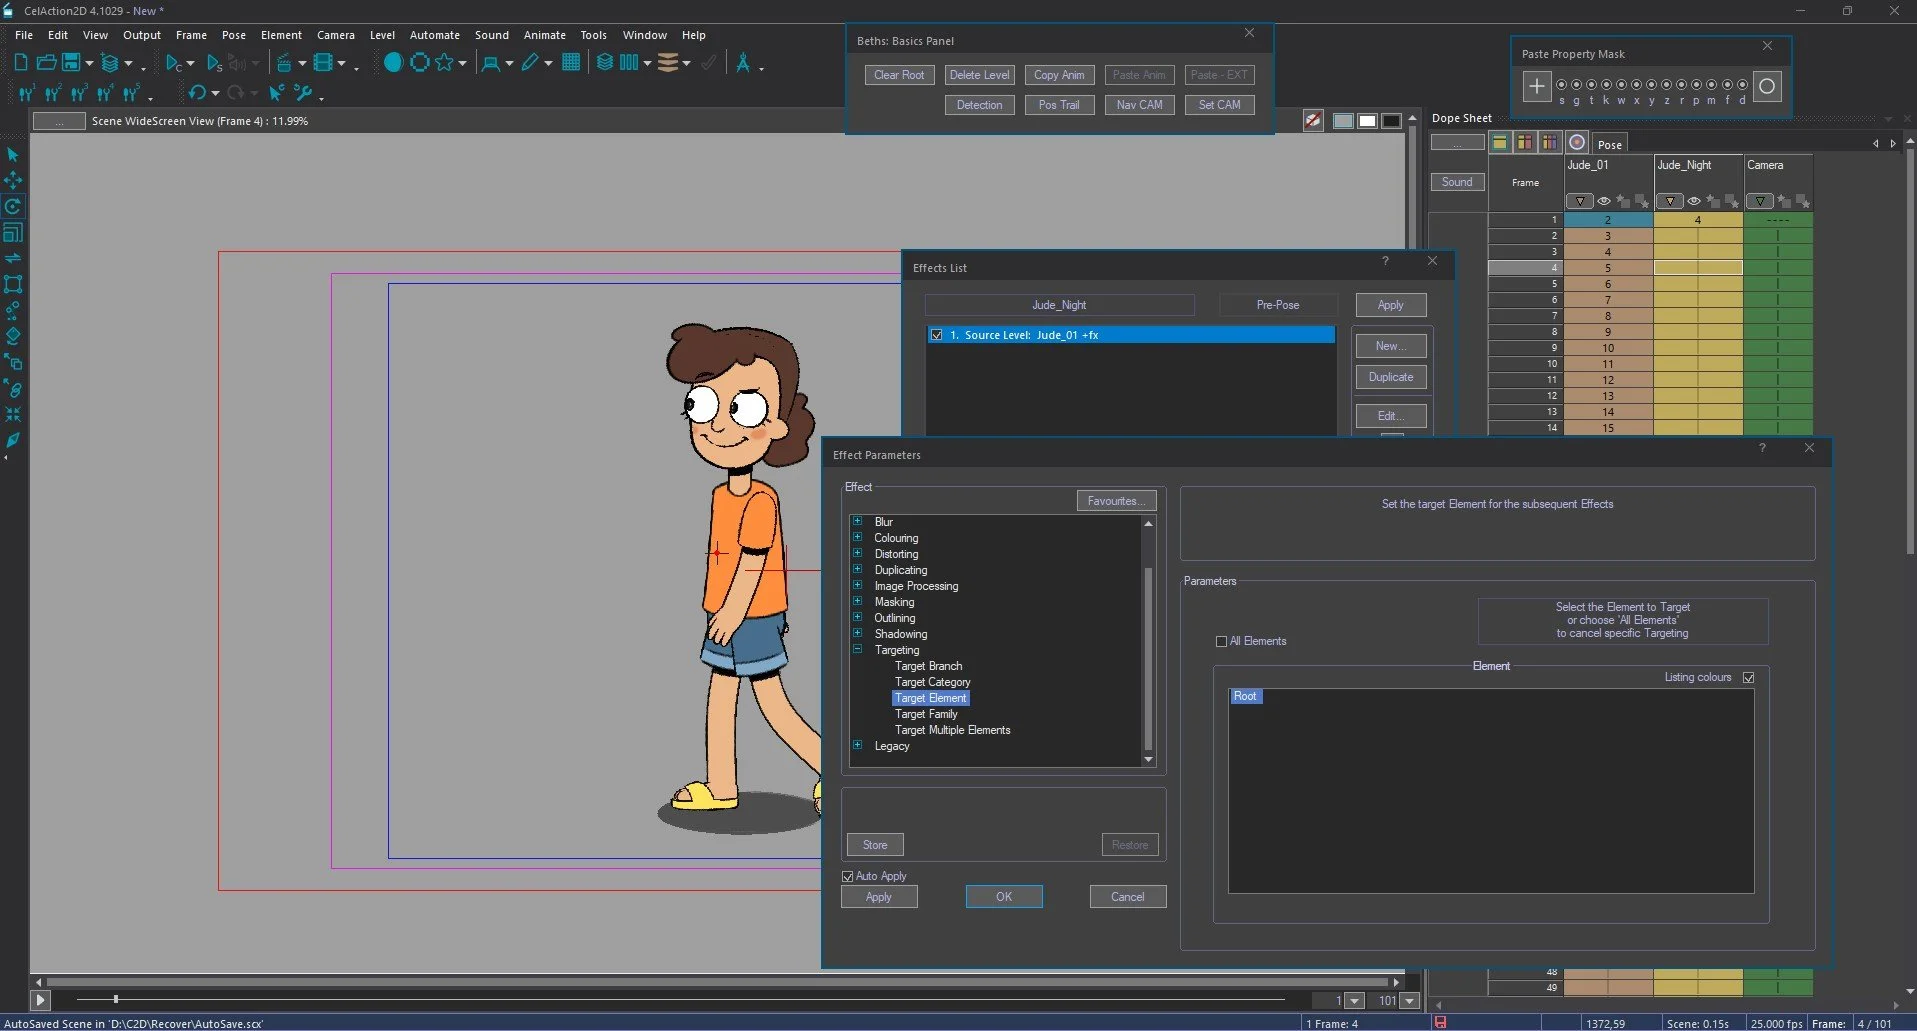
Click OK. The sourced character should now sit exactly on top of your original rig.
Step 2: Target the root
Click New in the effects list.
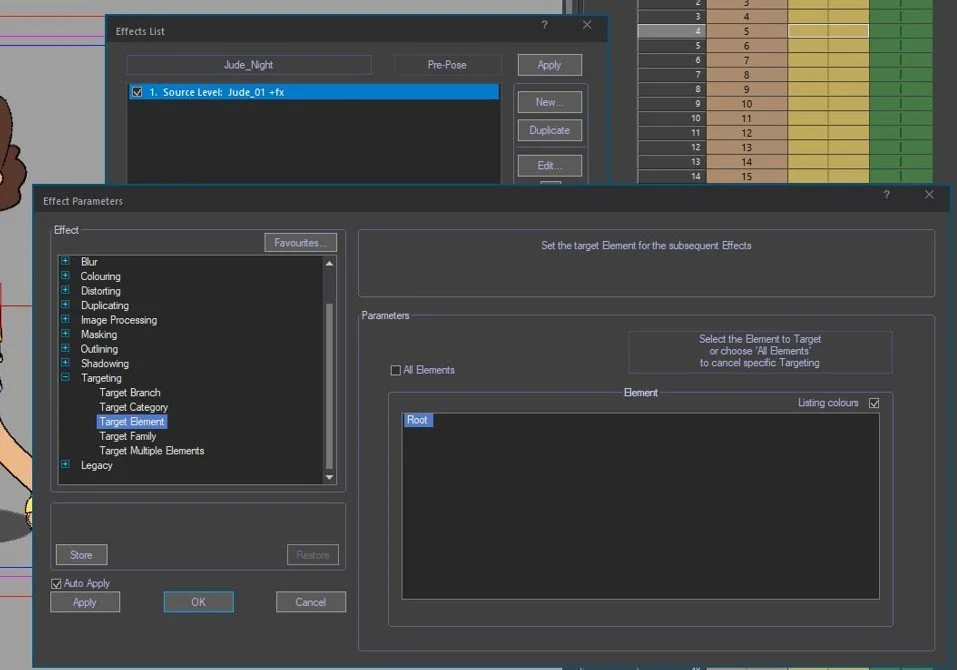
Choose Target Element.
The only available target on this layer is Root. Select it and click OK.
Step 3: Add a silhouette colour
Click New.
Type SIL - this brings up Silhouette.
With Auto Apply on, the character will go solid black immediately.
Pick a blue hue for a nighttime feel.
Click OK.
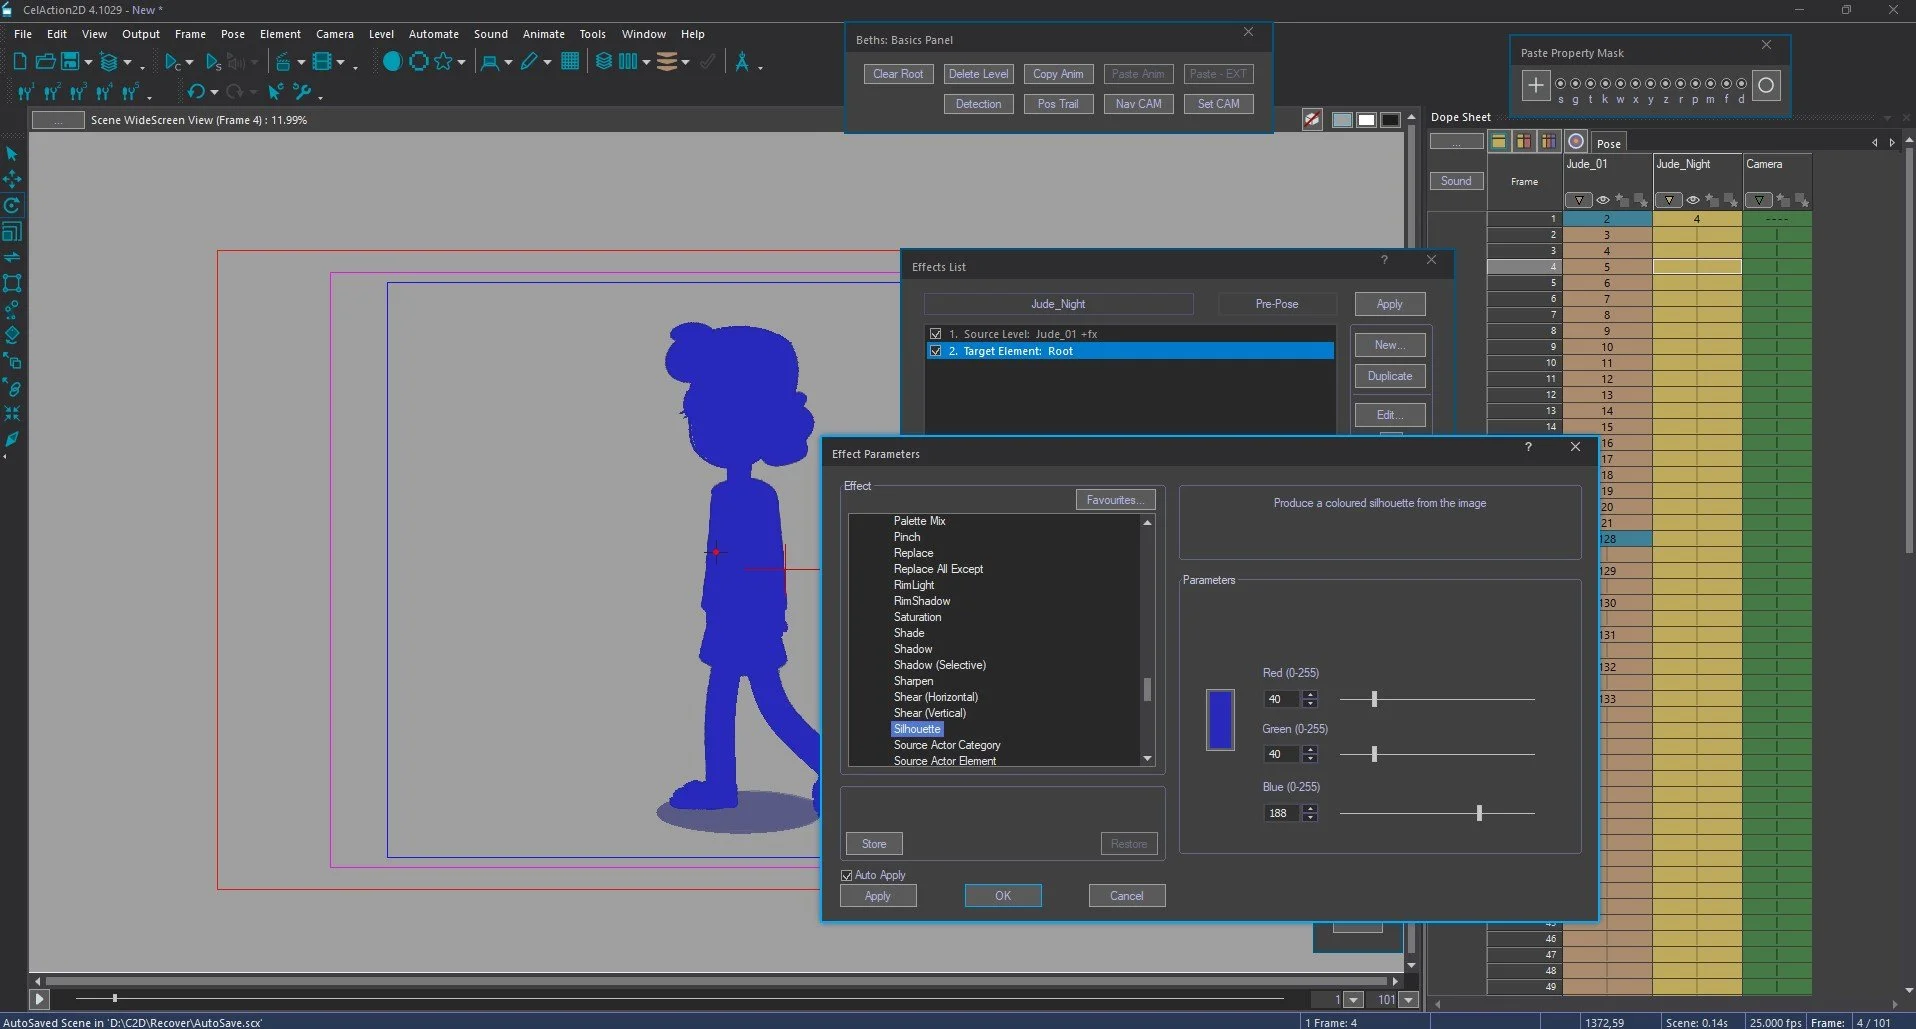
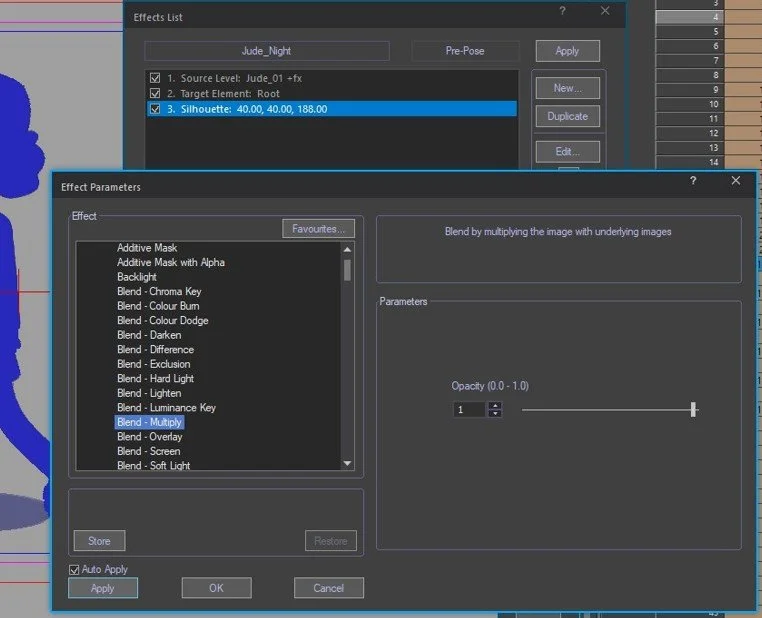
Step 4: Set the blend mode
In the effects list, click the + button next to All.
Scroll to Blend Multiply and click OK.
Click the small Apply button in the effects list.
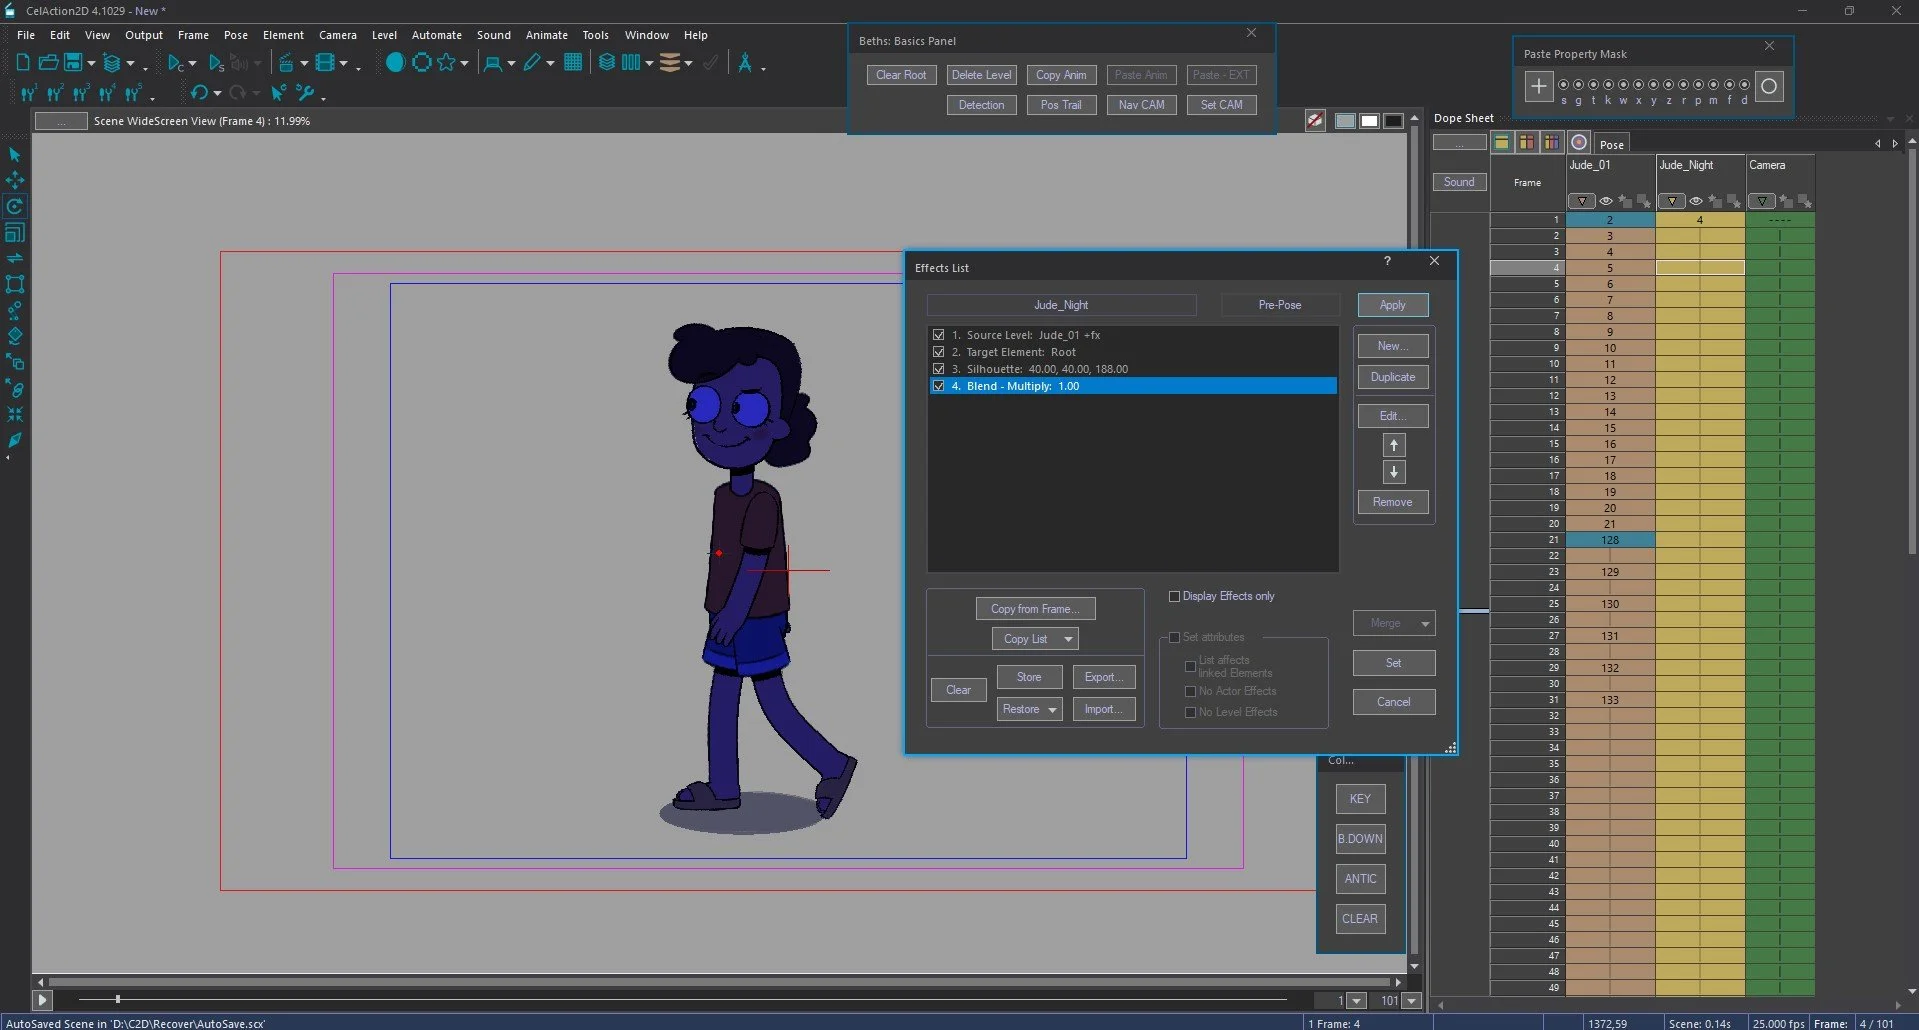
Step 5: Adjust opacity
Click New.
Type OP to find Opacity.
Set it to around 50% and click OK.
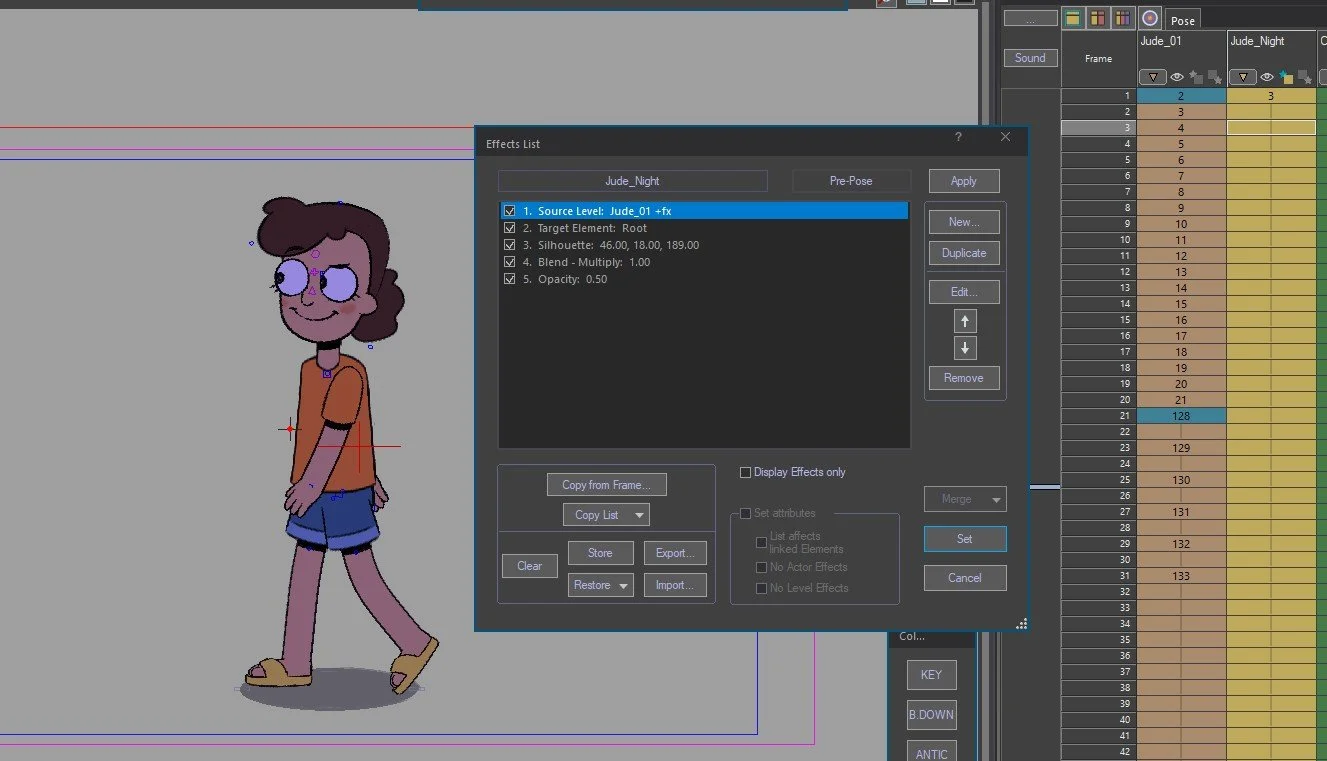
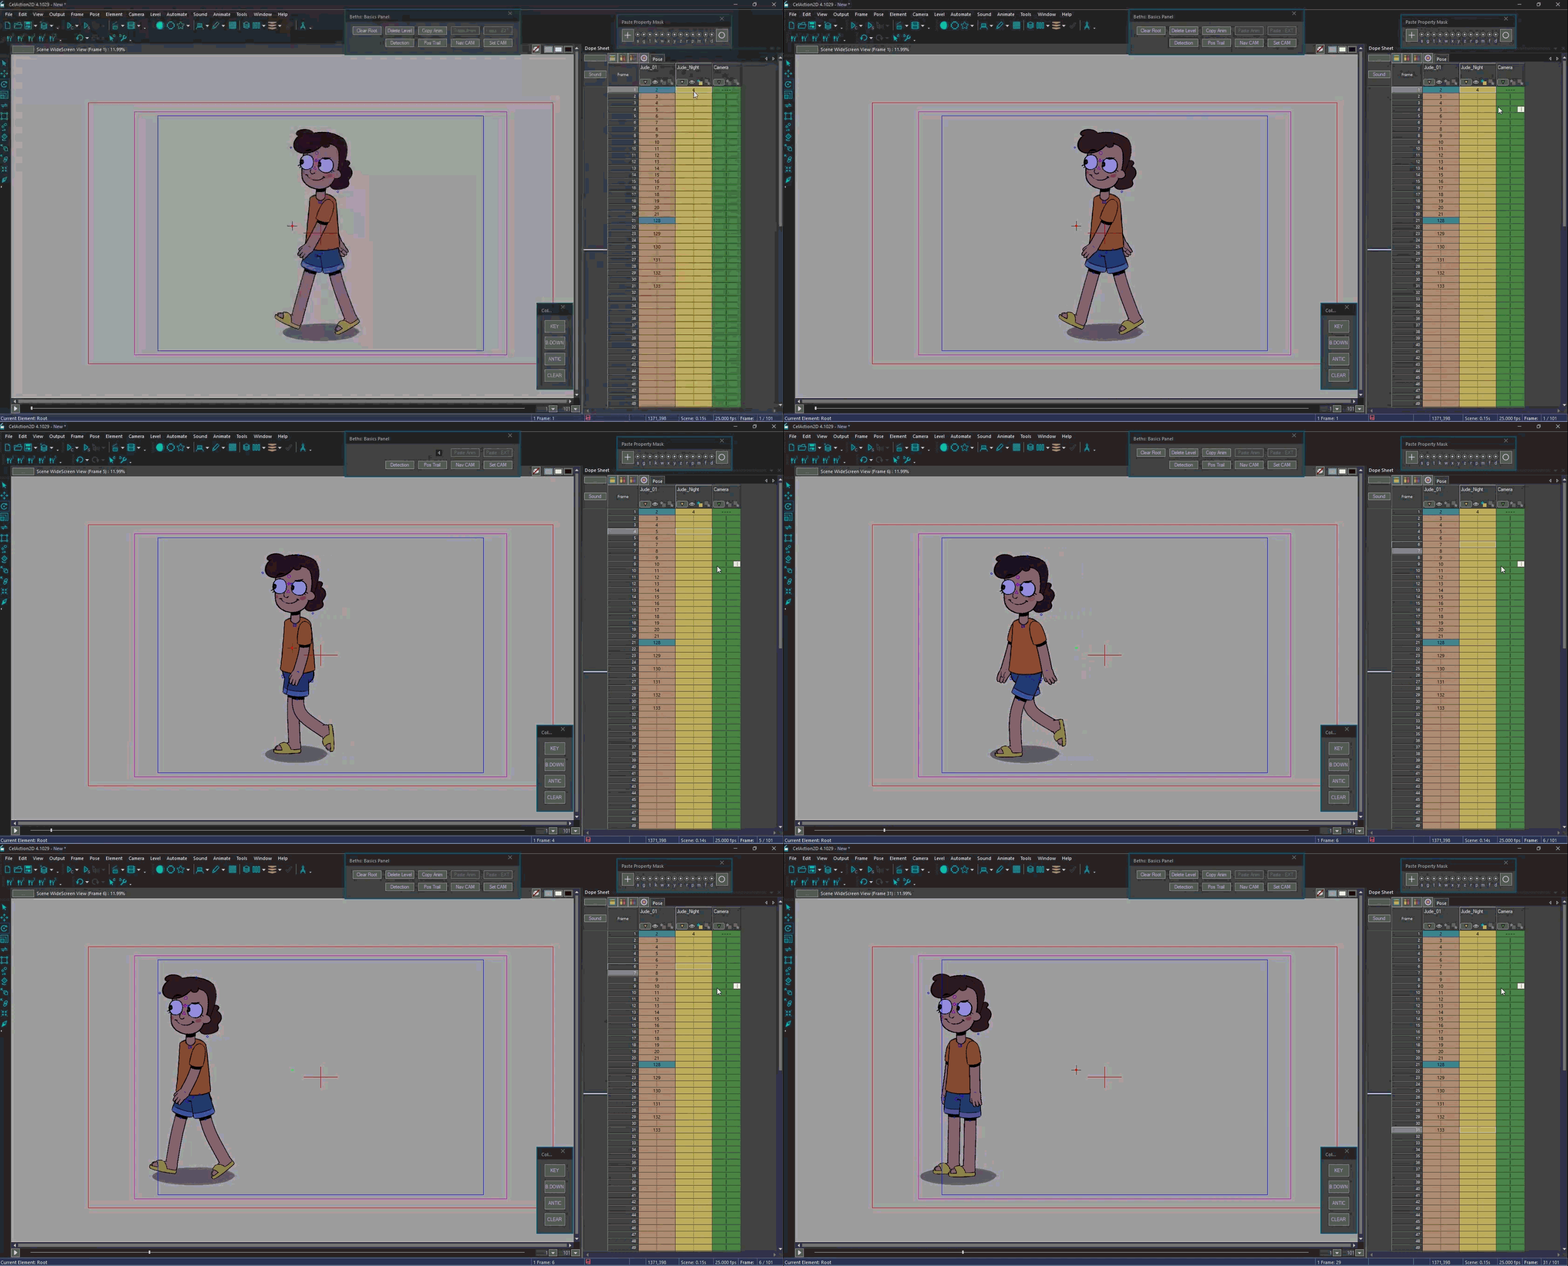
What you've built
Open scene contents for the Jude Night layer by pressing S. You'll see it contains nothing but a root. No drawings, no animation keys. It's just referencing the original Jude rig, flattening it, and applying the blue multiply at half opacity on top.
The original rig animates as normal. The source layer tracks it and carries the effect.
That's the core of why source layers work so well for character lighting in CelAction - rather than patching effects onto each separate piece of a rig, you treat the whole character as one clean shape and apply your treatment from there.